

Seamless Transformations: Why Professional Floor Installation Matters in Ottawa
April 23, 2025
Engineered Wood Floor Installation in Ottawa: Methods, Subfloors, and Timeline
September 21, 2026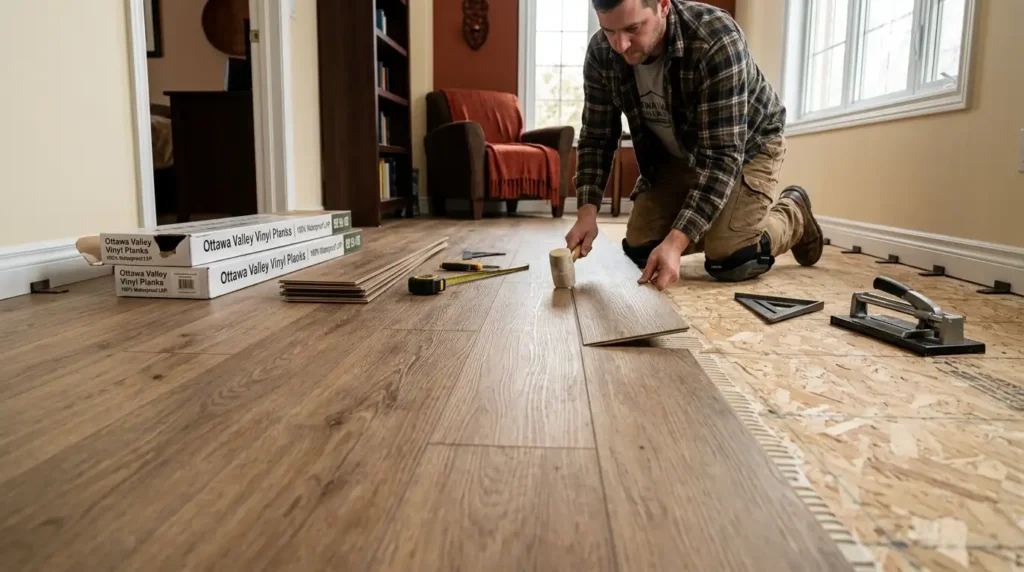
Vinyl plank is the flooring that made DIY seem plausible. The planks click together, no glue is required, the material is forgiving, and every hardware store carries a display promising a weekend project and a transformed room.
Sometimes that’s exactly what happens, and sometimes it isn’t. The honest question isn’t whether you’re capable of clicking planks together, because most people are. It’s whether the specific room you’re flooring will punish the mistakes that beginners reliably make, and that varies enormously.
This guide sets out what vinyl plank flooring installation actually involves, where DIY works, and where it costs more than it saves.
What the Job Actually Involves
Laying the planks is the easy part, and it’s the part everyone pictures. The work that determines whether your floor succeeds happens before and around it.
Subfloor assessment comes first, which means checking flatness, moisture, and soundness, then fixing what’s wrong. Acclimatisation follows, letting the material sit in the room until it reaches the temperature and humidity it will live in. Layout planning decides where the first row goes so the last row isn’t a two-centimetre sliver against your most visible wall. Then there’s cutting, which means every doorway, every pipe, every cabinet toe-kick, and every irregular wall. And finally transitions and trim, covering where the vinyl meets tile, carpet, or a threshold, and how the perimeter gap gets concealed.
The planks themselves click together in an afternoon. Everything else is where the time goes and where the failures come from.
Where DIY Genuinely Works
There are rooms where a careful homeowner gets a good result, and it’s worth being clear about them.
A rectangular bedroom with a flat, sound subfloor, one doorway, and no plumbing is a genuinely reasonable project. There’s little cutting, the layout is simple, the room forgives a slightly imperfect edge because furniture covers it, and if something goes wrong the consequences stay contained.
A home office, a spare room, a straightforward basement rec room with a level slab. All achievable. If you’re patient, if you read the manufacturer’s instructions rather than a video, and if you accept it will take longer than you think, the result can be very good.
Click-lock floating installation is what makes this possible. There’s no adhesive, no wet trade, and mistakes can often be unclicked and redone.
Where DIY Goes Wrong
The failures are predictable, which is useful, because it means you can check whether your room is likely to produce them.
Subfloor Problems
This is the biggest one by a distance, and the one homeowners most consistently underestimate.
A floating floor needs a flat subfloor. Manufacturers typically specify flatness within a few millimetres over a given span, and most subfloors in older Ottawa homes don’t meet it without work. Lay a rigid plank floor over a subfloor that dips and the floor bridges the dip, flexing when you walk on it. The joints work against each other, and eventually they separate or the locking mechanism fails.
Floor leveling is real work. It means diagnosing the high and low spots, grinding or filling as required, and verifying the result. It isn’t difficult, exactly, but it’s unglamorous, it takes time, and it’s the step people skip because the floor looks flat.
Moisture is the other subfloor issue, particularly in basements. A concrete slab carries moisture from the ground, and while vinyl itself is waterproof, moisture trapped beneath it causes problems and can void warranties. A moisture test is cheap and quick, and skipping it is a gamble.
Expansion Gaps
Vinyl expands and contracts with temperature. A floating floor must have a gap around every wall and every fixed object, and that gap has to be maintained, not just at installation but by never letting anything pin the floor down.
Miss it, and on the first warm day the floor has nowhere to expand. It buckles, usually in the middle of the room, and the fix means taking up the perimeter and cutting the gap that should have been there in the first place.
Layout and Cutting
Where the first row goes determines where the last row goes, and getting that wrong isn’t something you notice until the end.
Doorways, thresholds, and irregular walls all need careful cutting. Cabinet toe-kicks need undercutting. Pipes need holes cut precisely enough that the escutcheon covers them. None of it is beyond a competent DIYer, but each one is a chance to ruin an expensive plank, and the offcuts add up.
Rooms That Should Go to a Professional
Some rooms should simply be handed over, and it’s worth naming them.
Kitchens have appliances to work around, cabinet toe-kicks to undercut, plumbing penetrations, and a dishwasher that must be able to come out again. The cutting is fiddly and the consequences of a bad transition at the sink are wet. Where kitchens and entryways are concerned, waterproof vinyl flooring makes the material choice easier, but the installation still rewards experience.
Basements have slab moisture, potential drainage, and often a floor further from level than anyone expected. Getting a basement floor wrong is expensive, because you may not discover the problem until moisture has been trapped for a season. Our guide to the best flooring for basements covers what to look for below grade.
Large open spans, particularly open-concept main floors, need expansion planning that goes beyond a perimeter gap, and long uninterrupted runs are unforgiving of accumulated error. Entryways demand transitions and thresholds that actually seal. And anywhere the flooring runs continuously across multiple rooms, the layout has to be planned as a whole, which is difficult to do well the first time you try it.
What You Get from Hiring It Out
The reason to hire out isn’t that the work is impossible. It’s that the failure modes are expensive and the guarantees are meaningful.
Professional installation means your subfloor gets assessed properly, moisture gets tested, leveling happens as a matter of course rather than as an optional extra, and the layout is planned before the first plank goes down. The cuts are clean, the transitions are correct, and the expansion gaps are right.
It also means the work is guaranteed. If a floating floor buckles in eighteen months because the perimeter gap was wrong, that’s a problem someone else owns.
There’s a warranty dimension too. Many manufacturers require professional installation for the full warranty to apply, or they require specific underlayments and moisture barriers a homeowner may not know to use. Voiding a fifteen-year warranty to save on installation is a poor trade. If you want a sense of the process, professional flooring installation walks through the phases from consultation to the day itself, and our pre-installation checklist sets out how to prepare the room whichever route you take.
How Vinyl Compares to the Alternatives
If you’re still deciding on the material rather than the installation method, the comparison is worth making properly.
Luxury vinyl plank vs hardwood sits vinyl against real wood, and it’s the comparison that matters most for main living areas. LVP is fully waterproof, warmer and quieter than tile, softer underfoot than either, and considerably cheaper than hardwood flooring. What it gives up is the genuine article: it will never refinish, and it doesn’t carry hardwood’s resale weight.
Against laminate flooring, vinyl wins on waterproofing and comfort but sits at a similar price point, and the choice often comes down to which one looks better in your specific room. Our overview of resilient floors covers vinyl and cork together, and the choice within the category depends on what you’re optimising for. For a wider view of what’s available, our guide to the different flooring types we carry sets out the whole range.
Caring for a Vinyl Plank Floor
Vinyl is among the least demanding floors you can own, and most of what shortens its life is avoidable.
Sweep or vacuum regularly, since grit is what abrades the wear layer. Use felt pads under furniture, because vinyl is soft and dents under heavy point loads in a way harder floors don’t. Clean with a damp mop and a neutral cleaner, avoid abrasive pads, and skip the steam mop entirely. General hardwood floor care habits transfer well to vinyl, and Ottawa’s harsh season deserves its own approach, covered in our guide to winter floor maintenance.
Direct sunlight fades vinyl over years, so if a room takes strong afternoon sun, blinds are worth considering. Beyond that, a vinyl plank floor asks for very little and gives back a great deal.
Send Us a Photo of Your Subfloor
Almost every DIY vinyl installation that fails, fails because of the subfloor, and almost nobody can tell whether theirs is flat enough by looking at it.
We can check it in a short visit, tell you honestly whether your room is a reasonable DIY project or one that needs professional floor installation, and quote you either way. Visit our flooring showroom on Colonnade Road to compare vinyl plank in the wear layers and formats that suit your room, browse our room scenes gallery for design inspiration, and review our our work portfolio for installed floors.
Ready to get started? Reach out for the flooring services ottawa homeowners trust, or call 613-274-7977 to schedule your free consultation.
